
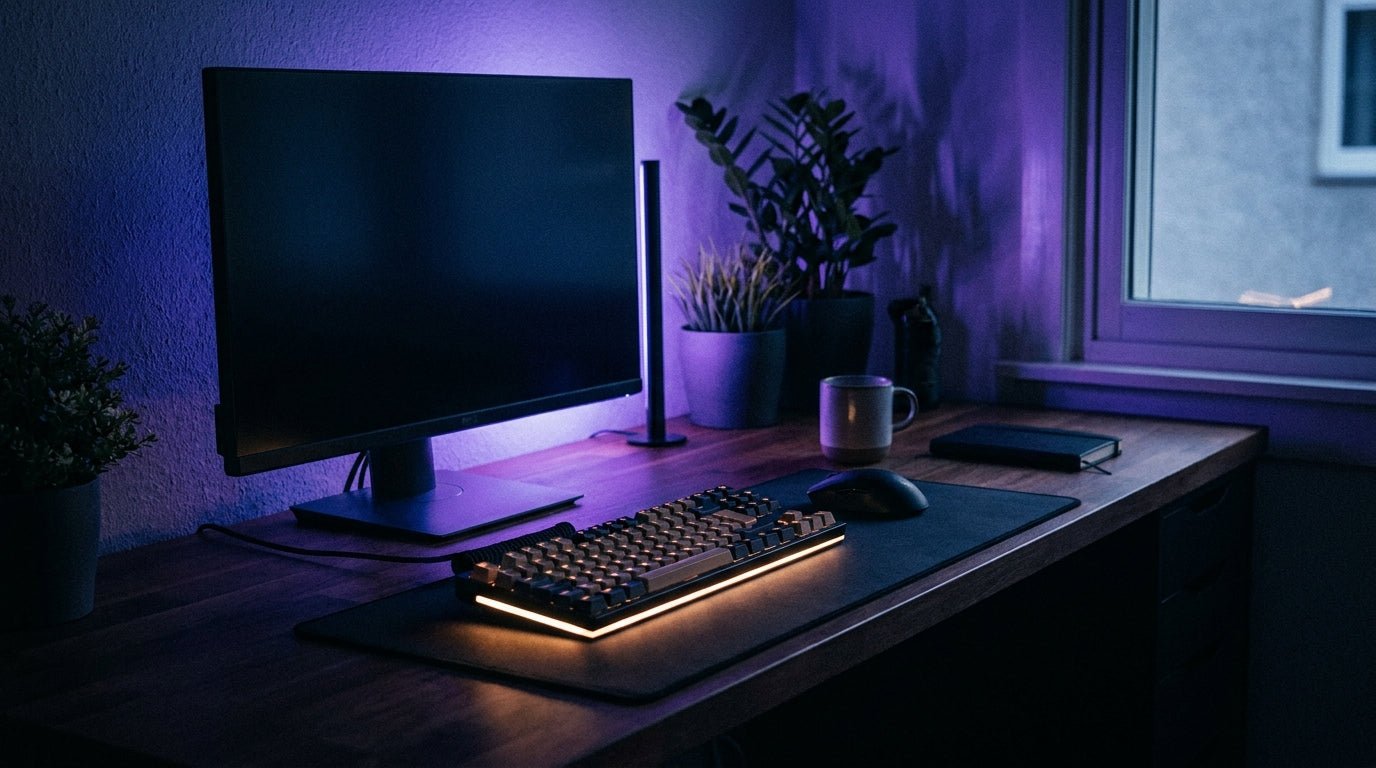
You do not need a wall covered in expensive light panels to build a gaming setup that looks carefully considered. Some of the best gaming room lighting ideas begin with one well-placed light, a sensible colour palette and cables that are not hanging across the back of the desk.
The aim is not to fill every empty surface with RGB lighting. It is to identify what the room is missing, add the right type of light and make each upgrade work with the rest of the setup.
This guide explains where to begin, where different gaming lights work best and how to improve your room gradually without buying everything at once.
What Makes Budget Gaming Lighting Look More Expensive?
Price is only one part of how a gaming lighting setup looks. Placement, diffusion, brightness and colour consistency often make a greater visual difference than the cost of the products.
A bright LED strip with every individual diode visible can look unfinished when it is attached directly to the front of a desk. Place the same strip beneath the rear edge, where its light can reflect from the wall or floor, and the result usually looks much cleaner.
The same principle applies throughout the room. In most cases, you want to see the glow rather than stare directly at the light source. Indirect lighting creates softer edges, fills dark areas and adds depth without distracting you from the monitor.
A polished gaming setup normally has four qualities:
- Each main light source has a clear purpose.
- The colours complement one another instead of competing.
- Direct glare is kept away from the screen and your line of sight.
- Power leads, controllers and excess cables are routed neatly.
Before buying another light, switch on the products you already own and look at the room from the doorway. The weakest area is often easier to notice from a distance. The wall behind the monitor may disappear into darkness, the underside of the desk may look empty or the entire room may depend on one harsh ceiling light.
Choose a Colour Direction Before Adding More RGB
One of the easiest ways to make affordable gaming lights look intentional is to limit the number of colours being displayed at once.
Choose one main colour and, when needed, one supporting colour. Purple and blue create a familiar gaming-room appearance. Cyan and pink feel brighter and more energetic. Warm white and amber create a calmer environment that can work well for gaming, films and everyday use.
You can still use animated effects, gradients and music-reactive modes. However, it often helps to save faster effects for games, music or particular occasions. A static colour or slow-moving scene is generally easier to coordinate across several products.
Consider the colours already present in the room. A white desk, pale wall and silver monitor may work well with cool white, blue or pastel shades. A black desk and darker wall can usually support stronger purple, red or cyan lighting.
The lighting should complement the room rather than trying to replace its entire design.
Decide Which Gaming Lighting Upgrade You Actually Need
The best lights for a gaming room depend on the problem you are trying to solve. Instead of purchasing several products at once, begin with the area that will make the greatest difference to your own setup.
Add Lighting Around the Monitor
If the monitor is the only bright object in the room, begin around the display. A soft glow behind or above it can separate the screen from the wall and make the desk area feel less flat.
A monitor backlight is useful when you want an indirect halo around the display. The Zyko RGB Monitor Light Bar combines practical front lighting with colourful rear ambience, making it useful for desks that need both focused illumination and background colour.
Position monitor lighting so that the LEDs are not directly visible from your chair. Check the screen from your normal viewing position and make sure the light does not create distracting reflections.
Monitor lighting can be particularly useful in a smaller bedroom because it improves the area you look at most without requiring a large installation across the wall.
Use a Smart Bulb to Change the Wider Room
A monitor light can improve the desk while leaving the rest of the room dark. A smart bulb changes the wider atmosphere without requiring a permanent wall installation or a completely new lamp.
If you already own a lamp with a compatible fitting, replacing its standard bulb with a Zyko Smart RGB+CCT E27 Bulb gives you colour lighting, adjustable warm-to-cool white illumination and brightness control through one fitting.
This is useful when the same room is used for gaming, working and relaxing. You can use a clearer white setting when practical visibility matters, then lower the brightness and introduce colour during a gaming session.
Smart bulbs can also soften the contrast between a brightly lit desk and a completely dark room. Aim the lamp towards a wall or corner when you want a wider reflected glow instead of a concentrated pool of light.
Add Wall Lighting When the Setup Needs a Focal Point
Wall lights are less about illuminating the entire room and more about giving the setup a recognisable centrepiece. They work best when the desk already has enough practical lighting but the wall behind or beside it still feels empty.
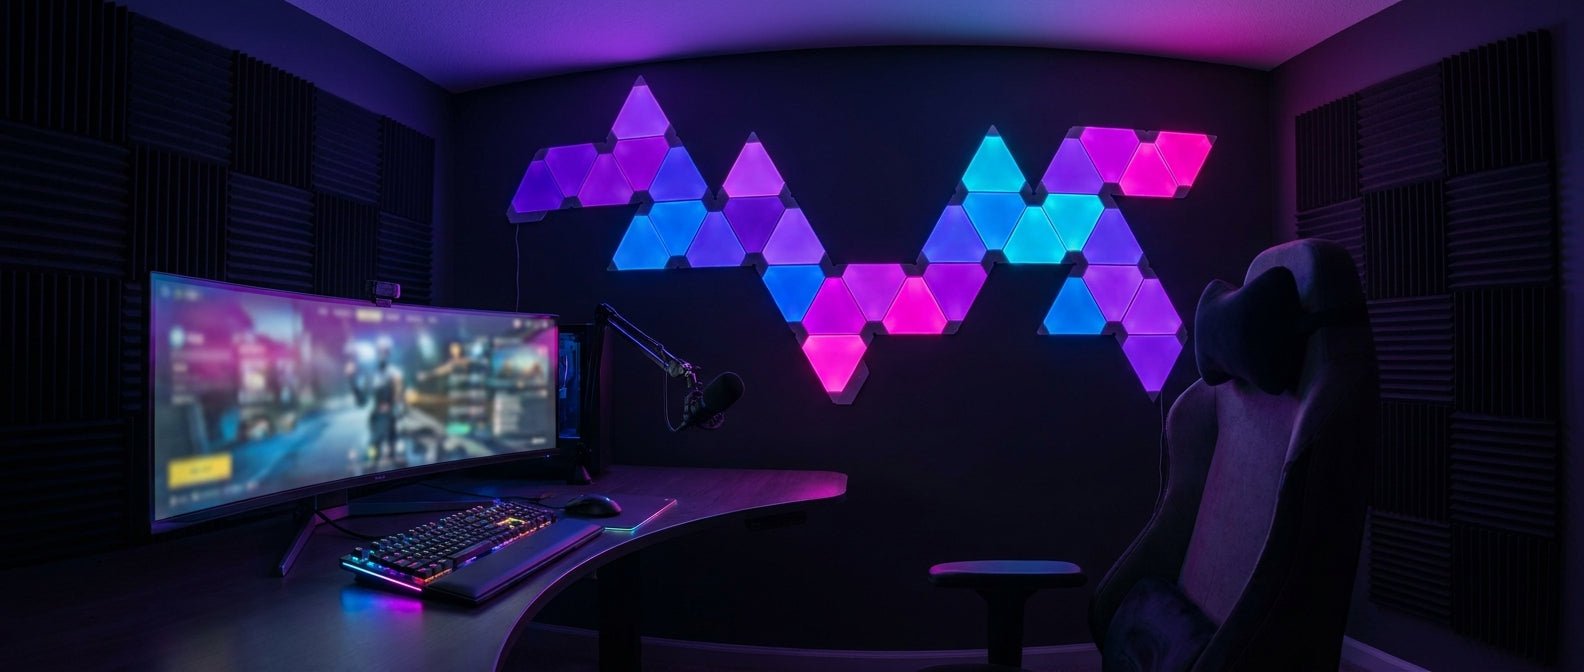
Geometric panels can create a defined pattern above a monitor, while linear wall lights are useful for narrower or more angular layouts. The Zyko Elements collection includes modular wall-lighting designs that can be arranged around the shape and available space of the room.
Do not assume that a larger arrangement will always look better. In a small room, a compact design centred around the monitor may feel more intentional than lights spread across the entire wall.
Plan the shape on the floor before attaching anything. Check the available wall area, socket position, cable route and distance from the desk. This takes a few minutes and can prevent an arrangement that looks good by itself but feels awkward once installed.
Extend the Colour Scheme Into the PC
Once the desk and room lighting feel balanced, you can carry the same colour scheme into the computer.
ARGB case fans and illuminated cable extensions can visually connect the PC with the monitor and wall lighting. Matching the PC to the wider room generally looks cleaner than running a completely different effect on every internal component.
For example, a blue and purple wall scene can be supported by blue case-fan lighting and a softer purple cable glow. The components remain visible without turning the PC into a separate, competing light display.
The Zyko PC Lighting collection includes ARGB case fans and illuminated cable extensions for people who want the colour scheme to continue inside their computer.
Where to Put LED Lights in a Gaming Setup
Good LED placement depends on what you want each light to achieve. A practical way to plan the room is to separate your lighting into monitor, desk, furniture, wall and general room areas.
Behind the Monitor
Place the light where it has enough distance from the wall to create an even spread. When a monitor sits very close to the wall, lower the brightness to prevent a concentrated hotspot from forming immediately behind the screen.
Keep individual LEDs out of your direct line of sight. You should notice their colour reflecting from the wall rather than seeing a row of bright points.
Screen-reactive lighting can extend colours from games and films into the room. Static monitor backlighting is simpler and may be preferable when you want a consistent everyday scene.
Zyko’s Atmos Lighting collection contains reactive lighting designed for monitor and television setups.
Under the Desk
Under-desk lighting can create a floating appearance, particularly when the desk has simple legs and a reasonably clear floor beneath it.
Mount the strip towards the rear rather than directly along the front edge. This hides the LEDs and gives the light more room to spread across the floor and nearby wall.
Route the power cable alongside the desk frame and secure any excess length. A visible loop of cable hanging below the desktop can undermine an otherwise clean installation.
Behind Shelves and Furniture
Lighting behind a shelf, drawer unit or television stand can make the room feel deeper without adding another clearly visible fitting.
This works well when the monitor area already contains plenty of colour. A lower source elsewhere in the room prevents the entire lighting design from being concentrated around one bright rectangle behind the desk.
Leave enough clearance around the light for heat to disperse and avoid crushing cables behind heavy furniture.
On the Wall
Wall lighting should relate to the position of the desk. You could centre a pattern above the monitor, align it with one side of the desk or use its shape to guide the eye towards the setup.
Leave some empty wall around the installation. Negative space gives the design a clearer outline and helps prevent the background from appearing overcrowded.
People renting their room should also check the mounting method before installation. Consider the condition of the wall, the strength of the supplied adhesive and whether removal could affect paint or wallpaper.
Across the Wider Room
Use smart bulbs, spotlights, lamps or ceiling lighting when you want the atmosphere of the entire room to change instead of only the desk.
Directional lighting can be aimed towards a wall, corner, shelf or display area. Reflected light generally feels softer than a bright source aimed directly towards the chair.
Keep strong light away from the monitor surface, particularly when using a glossy screen. Reflections can become distracting even when the colour itself looks attractive.
RGB vs RGBIC Lighting for Gaming Rooms
RGB and RGBIC are often treated as interchangeable terms, but they produce different types of effects.
Standard RGB lighting normally displays one selected colour across the whole product at a time. This is perfectly suitable when you want a consistent blue, purple, red or white glow throughout the setup.
RGBIC lighting allows different sections of the same product to display different colours simultaneously. This makes gradients, flowing effects and multicolour scenes possible.
RGBIC is useful when the lighting itself is intended to become a visible feature. Standard RGB may be all you need for a hidden strip beneath the desk or behind a monitor.
Do not pay for additional effects simply because the technology sounds more advanced. Choose according to what the light will be doing in your room.
Three Ways to Plan Gaming Lighting on a Budget
You do not need to choose your gaming lights according to a fixed spending figure. Prices change, room sizes vary and one carefully positioned product can sometimes create more impact than several poorly planned additions.
It is more useful to decide how many areas of the room you want to improve.
The Single-Upgrade Setup
Choose this approach when your budget is tight or you have not yet decided which aesthetic you want.
Add one light around the monitor or place one smart bulb in an existing lamp. Use a single colour for several days and test how the room feels at different brightness levels.
This prevents you from buying a complete collection before understanding what the room actually needs.
The Balanced Two-Layer Setup
Combine one desk-focused light with one wider ambient source.
For example, use monitor lighting to define the display area and a smart bulb to colour the room behind you. Another option is under-desk lighting paired with a compact wall installation.
Keep both layers within the same colour family. Set one slightly dimmer than the other so the setup has a clear focal point rather than two equally bright areas competing for attention.
The Full-Room Setup
Build a complete gaming-room lighting setup in stages instead of ordering every product at the same time.
- Improve the area around the monitor.
- Add ambient lighting to the wider room.
- Choose one wall or furniture-based focal point.
- Carry the same colour direction into the PC.
- Add reactive lighting only when the basic layout already feels balanced.
The finished room may contain several products, but each one should perform a different role. Repeating the same effect in five locations rarely adds as much as balancing the desk, wall and wider room.
How to Make Cheap Gaming Lights Look Better
Hide the Light Source
Try to mount LED strips behind the monitor, beneath the desk or behind furniture. Letting the light reflect from a nearby surface normally creates a smoother finish than leaving the individual LEDs fully exposed.
Reduce the Brightness
More brightness does not always create a better result. Excessively bright accent lighting can wash out colours, make dark areas appear harsher and distract from the monitor.
Begin at a low brightness setting and increase it gradually. Background lights often require less output than expected, especially when they are reflecting from a white or pale wall.
Use One Dominant Colour
A limited palette helps products from different ranges look like part of the same setup. Select one main colour and allow a second colour to appear in smaller areas or gradients.
Organise the Cables
Plan where each controller, connector, USB cable and power lead will go before attaching the light. Adhesive clips, reusable ties and an under-desk cable tray can make an inexpensive product look much more carefully installed.
Keep cables away from chair wheels, moving monitor arms and places where they could be pulled accidentally.
Photograph the Setup
Take a photograph from the doorway and from your normal seated position. A camera often makes uneven brightness, visible cables and mismatched colours easier to notice.
When the lighting is intended for streaming or content creation, take another image from the camera’s actual position. A setup can look balanced in person but very different through a webcam.
Common Gaming Room Lighting Mistakes
Using Maximum Brightness Everywhere
When every light is operating at full brightness, the setup can lose depth because each area is fighting to become the focal point.
Use stronger lighting around the area you want people to notice first. Keep background and supporting lights slightly dimmer.
Leaving Every LED Fully Exposed
Visible LED points are not always a problem, particularly on products designed to be viewed directly. However, exposed adhesive strips can produce a rougher appearance when the intended result is a soft ambient glow.
Mixing Too Many Effects
A pulsing wall, chasing desk strip, colour-cycling bulb and flashing PC can make the setup feel disconnected.
Choose one main animated effect. Allow the remaining products to stay static or move more slowly.
Ignoring Cable Routes
Do not wait until after installation to decide where the power cable will go. A technically impressive lighting system can still look unfinished when controllers and wires are left hanging below the desk.
Buying a Centrepiece Before Fixing the Basics
A large wall installation cannot compensate for harsh overhead lighting, distracting screen reflections or cables spread across the desktop.
Improve the basic desk lighting first. A wall centrepiece will have more impact when the surrounding area already looks organised.
Copying Another Setup Without Considering Your Room
A lighting arrangement that looks excellent in a large studio may overwhelm a small bedroom. Wall colour, furniture, available sockets and the distance between the monitor and wall all affect the result.
Use other setups for inspiration, but adapt their ideas to the dimensions and limitations of your own room.
Gaming Lighting for Small Bedrooms and Rented Rooms
Many gaming setups are built in bedrooms rather than dedicated gaming rooms. Limited wall space and restrictions on drilling do not prevent you from creating an effective lighting arrangement.
Prioritise products that use existing furniture and fittings. A smart bulb can work in a lamp you already own. A monitor light uses the display area rather than the wall. A hidden strip can attach beneath the desk instead of running around the entire room.
Choose one compact focal point rather than trying to cover every wall. A small panel arrangement above the monitor may provide enough character without making the room feel crowded.
Before using adhesive wall products, clean and dry the surface and check whether the paint is secure. Test a small removable adhesive in an inconspicuous location when you are concerned about damage.
Measure the cable route as well as the visible lighting area. The nearest socket may be further away than expected once the wire has been routed discreetly around furniture.
Build Your Gaming Lighting Setup Gradually
A good gaming lighting setup does not need to be completed in one order. Begin with the area that bothers you most and make one meaningful improvement.
If the screen feels isolated against a dark wall, start with monitor lighting. If the wider room looks empty, try a smart bulb. If the desk works well but the background lacks character, explore the Zyko Elements collection for modular wall-lighting options.
After installing the first product, use it for a while before deciding what to add next. You may discover that the room needs a softer supporting light rather than another bright centrepiece.
This slower approach usually creates a more coherent result and reduces the chance of buying products that eventually remain switched off.
Frequently Asked Questions About Gaming Room Lighting
How should I light my gaming room?
Begin with soft lighting around the monitor or desk, then add a second source for the wider room. Keep direct glare away from the screen and use a consistent colour palette. Add wall lighting or illuminated PC components after the main desk area feels balanced.
What is the best lighting for a gaming room on a budget?
The best first upgrade depends on the room. A monitor light can improve the main desk area, while a smart bulb can change the atmosphere of the whole room through an existing lamp. LED strips are useful when you have a concealed mounting position beneath a desk or behind furniture.
How can I improve gaming-room lighting cheaply?
Start by repositioning the lights you already own. Aim lamps towards walls, reduce excessive brightness, organise visible cables and choose a limited colour palette. When purchasing something new, select one product that addresses the darkest or least developed area of the room.
What colour light is best for a gaming room?
There is no single best colour. Blue, cyan and purple suit a familiar RGB gaming look. Warm white and amber create a calmer environment, while red produces a stronger and more dramatic result. Choose colours that complement the desk, wall and PC rather than judging the light by itself.
Where should LED lights go in a gaming setup?
Useful positions include behind the monitor, beneath the rear edge of the desk, behind shelves and around a wall feature. Place strips where the light can reflect from a nearby surface and keep bright individual LEDs outside your direct line of sight.
Should gaming lights be behind or in front of the monitor?
Ambient gaming lights normally work best behind or above the monitor because they add separation without shining directly towards you. A front-facing light can be useful for streaming and video calls, but it should be diffused and positioned so that it does not reflect from the screen.
Are RGBIC lights better than standard RGB lights?
RGBIC lighting can display several colours along one product simultaneously, which makes it suitable for gradients and moving effects. Standard RGB is sufficient when you want the entire light to display one colour. The better option depends on the effect you want and where the light will be placed.
Are wall lights worth adding to a small gaming room?
Wall lights can work well in a small room when the pattern is kept in proportion to the available wall. A compact vertical or asymmetrical arrangement may suit a narrow bedroom better than a large installation. Measure the wall and plan the pattern before attaching the lights.
How many colours should a gaming setup use?
One main colour and one supporting colour are enough for most everyday setups. You can introduce more colours during animated scenes, but a limited palette is easier to coordinate and usually produces a cleaner appearance.
How can I make cheap LED lights look more expensive?
Hide the light source where possible, lower the brightness, use reflected light, organise the cables and keep the colours consistent. Careful positioning often makes a greater difference than adding another lighting product.
Do gaming lights help with eye strain?
A soft light around the monitor can reduce the severe contrast between a bright screen and a completely dark wall. However, decorative lighting should not be treated as a medical solution. Avoid glare, excessive brightness and strong reflections, and adjust the monitor and room lighting to a level that feels comfortable.
Do I need screen-synchronised gaming lighting?
No. Screen synchronisation can create a more immersive effect during games and films, but static colours and saved scenes are easier to configure and may suit everyday use better. Build a balanced basic lighting arrangement before deciding whether reactive lighting is worth adding.
Can different gaming-light brands be used together?
Yes, although their apps and effects may not synchronise perfectly. Products from different ranges can still look coordinated when you manually choose similar colours, brightness levels and effect speeds.
Is warm or cool lighting better for gaming?
Cool white lighting can provide a clearer, more energetic appearance, while warm white creates a softer and more relaxed room. Many people use adjustable white lighting so they can choose a brighter setting for practical tasks and a warmer scene later in the evening.
How bright should gaming-room lights be?
Accent lighting should normally be bright enough to create a visible glow without overpowering the monitor. Begin at a low setting and increase it gradually. Wall colour, distance and room size all affect how bright a product appears.
Final Thoughts
The most effective gaming room lighting ideas are not necessarily the most expensive. Start with a clear problem, choose one useful light and install it neatly. A controlled colour palette, indirect placement and tidy cables can make a modest setup feel far more complete.
When you are ready to add another layer, choose something that improves a different part of the room instead of repeating what you already have.
You can browse all Zyko lighting and setup products to compare options for your monitor, desk, wall, room and PC.


Leave a comment
This site is protected by hCaptcha and the hCaptcha Privacy Policy and Terms of Service apply.